
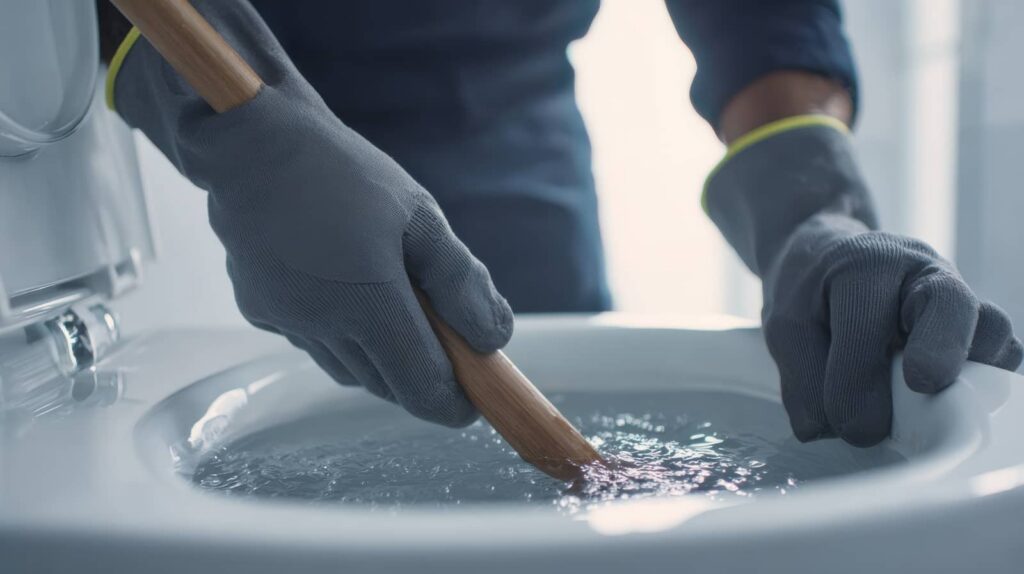
Before you start sewage cleanup or flood repair, you need to check for electrical hazards, contamination, and hidden structural damage. Shut off the water, isolate the area, and remove standing sludge fast. Then dry, disinfect, and inspect for mold or weakened materials. If you miss one step, the problem can spread behind walls and under floors. The next decisions matter more than they first appear.
Key Takeaways
- Prioritize safety: wear PPE, avoid contaminated water, and leave immediately if you smell gas or see electrical or structural damage.
- Stop the water source, shut off the main supply, and use barriers or sandbags to contain further flooding.
- Remove standing water and sludge quickly, then bag solids and dispose of debris according to local rules.
- Dry and disinfect thoroughly with fans, dehumidifiers, and EPA-registered cleaners; remove damaged drywall and insulation.
- Check hidden moisture, electrical systems, and structural damage, then repair weak points to prevent future flooding.
Check Safety Before Sewage Cleanup
Before you start sewage cleanup, check the area for immediate safety hazards, including electrical risks, structural damage, gas leaks, and contaminated water levels.
You should treat every wet surface as unsafe until you verify conditions. Follow PPE guidelines: wear gloves, boots, eye protection, and a respirator rated for biohazards.
If you smell gas, see damaged wiring, or notice sagging floors, stay out and get qualified help. Document contamination risks from sewage, standing water, and soaked materials before you enter.
Keep your team informed, move carefully, and avoid contact with cuts or open skin. Good cleanup crews protect each other by pausing when something looks wrong.
That shared caution helps you stay safe and ready for the next step.
Stop the Water and Seal the Area
Once the site is safe, shut off the main water supply and any local valves feeding the leak, then stop wastewater flow if you can do so without exposure. You’re protecting the crew and keeping damage contained.
Use barriers, sandbags, or taped plastic as water diversion strategies to redirect runoff away from walls, outlets, and clean zones. Then isolate openings with sealing materials options that match the surface and the moisture level.
- Close valves and tag them.
- Block low entries and drains.
- Seal cracks, joints, and vents.
- Brace loose covers or panels.
- Mark restricted areas for your team.
Work methodically, and check every barrier for leaks. If you’re unsure, pause and verify the source before moving on.
Remove Standing Water and Sludge
Start pumping out the standing water as soon as the area is contained, using a submersible pump, wet vacuum, or utility pump sized for the volume and debris load.
Keep your pump systems stable and clear intake screens often so you maintain steady water extraction.
Work in sections and use containment strategies to control flow while you move sludge with shovels, squeegees, and other cleanup equipment.
Wear safety gear, including gloves, boots, and eye protection, because sewage can carry hazards.
Bag solids for debris removal, then follow local sludge disposal rules and waste management limits.
If the water has heavy sediment, use simple filtration methods on the discharge line to reduce clogs and environmental concerns.
You’re not doing this alone; careful, methodical removal protects your crew and the site.
Dry Out Floors, Walls, and Furniture
Once you’ve removed standing water, open windows, run fans, and use dehumidifiers to increase air circulation around floors and walls.
Lift wet furniture off the floor and separate cushions, drawers, and panels so air can reach every surface.
Dry salvageable furniture quickly, and discard any item that stays saturated or shows structural damage.
Remove Standing Water
Pump out and mop up standing water as quickly as possible to limit further damage and mold growth. Use reliable pumping methods and water extraction tools to clear pooled water from floors, then check hidden corners, joints, and low spots.
- Remove loose debris first.
- Vacuum remaining water with a wet vac.
- Use towels for tight edges.
- Lift rugs and wet padding.
- Wipe furniture bases and legs.
You’ll protect your space by acting fast and working methodically. Don’t leave soaked materials in place; they trap moisture and weaken surfaces.
Check under appliances and along baseboards for trapped water. If you’re part of a cleanup crew, coordinate tasks so every area gets attention. Keep moving until no visible water remains, then inspect for damp spots that need another pass.
Increase Air Circulation
Open windows and run fans to move moist air out of the space and speed drying of floors, walls, and furniture. Position ventilation fans so they push damp air toward exits, not deeper into rooms. Keep them running day and night until surfaces feel dry to the touch.
Use air purifiers with HEPA filtration to reduce airborne particles and odors while you work; they won’t dry materials, but they help keep the air safer for your team. Create cross-ventilation by opening opposite windows when weather allows.
Lift drapes, rugs, and loose items off wet areas to let air reach hidden surfaces. Check wall cavities, baseboards, and under cabinets for lingering moisture. You’re not doing this alone: steady airflow helps your cleanup crew restore the space faster and with less risk.
Dry Salvageable Furniture
For salvageable furniture, get moisture out fast to prevent swelling, warping, and mold growth. You’re part of the recovery crew when you move items to a dry, ventilated space and separate cushions, drawers, and hardware.
Use clean towels, fans, and dehumidifiers to speed evaporation. Lift furniture off wet floors with blocks so air can reach every surface. If wood stays damp, continue drying and inspect joints, veneers, and padding daily.
Follow proven salvage techniques to reduce losses and protect your space. In furniture restoration, timing matters because trapped water weakens finishes and adhesives.
- Remove standing water immediately.
- Open panels, drawers, and doors.
- Wipe surfaces with absorbent cloths.
- Check for odor, discoloration, or mold.
- Discard items that stay saturated.
Disinfect After a Sewage Backup
After you remove the sewage and dry the area, disinfect all contaminated surfaces with a bleach solution or an EPA-registered disinfectant.
Follow safety protocols: wear gloves, eye protection, and a mask, and keep children and pets away until the space is safe.
Mix cleaning supplies exactly as directed, then apply the disinfectant with a clean cloth or sprayer and keep the surface wet for the label contact time.
Wipe away residue with disposable towels and discard them in a sealed bag.
Ventilate the room while you work and after you finish.
Clean tools, then wash your hands thoroughly.
If odors or staining remain, repeat the process.
When you handle this carefully, you protect your home and help your household get back to normal faster.
Cut Out Damaged Drywall and Insulation
Cut away any drywall and insulation that got wet or contaminated, since porous materials can hold sewage, moisture, and mold. You’ll protect the rest of the room by cutting at least 12 inches above the visible damage and removing each section in manageable pieces.
Wear gloves, eye protection, and a respirator while you work, and keep the area sealed off from clean spaces.
- Score straight lines before you cut
- Bag debris for proper drywall disposal
- Remove soaked insulation by hand
- Inspect studs for lingering residue
- Plan insulation replacement after framing dries
Work methodically so you and your crew can stay aligned and avoid spreading contamination. Dispose of all waste according to local rules, then clean tools before moving on.
Check for Mold Growth
Inspect the area for visible mold signs like discoloration, fuzzy growth, or a musty odor.
Check hidden moisture areas behind walls, under flooring, and around insulation, since mold can spread where water stayed trapped.
If you find growth, remove it safely with proper PPE, containment, and approved cleaning methods.
Visible Mold Signs
Mold can start growing fast after sewage or flood exposure, so check walls, baseboards, insulation, drywall, and hidden corners for visible patches, discoloration, or fuzzy growth. You should document every spot with photos and notes to support mold identification and protect your mold health.
Act quickly if you see staining, streaking, or a slimy film.
- Inspect surfaces under bright light.
- Look for green, black, white, or gray colonies.
- Compare affected areas with nearby clean surfaces.
- Mark each location for follow-up cleaning.
- Wear gloves and a mask during checks.
If you and your team stay methodical, you’ll catch early warning signs before damage spreads. Treat any visible growth as a cleanup priority, and don’t ignore odor paired with staining.
Hidden Moisture Areas
After checking visible damage, you also need to look where moisture can hide and keep feeding mold growth.
You should inspect behind baseboards, under flooring, inside wall cavities, around ductwork, and beneath cabinets. Use hidden moisture detection tools, such as a moisture meter, to find damp materials that feel dry on the surface.
Thermal imaging can help you spot cooler areas that often signal trapped water. Pay close attention to insulation, subfloor seams, and ceiling corners near leaks.
Open access panels and check plumbing chases, too. If you belong to a cleanup team, share findings quickly so everyone can track problem areas.
Mark suspect zones, document readings, and monitor them over the next 48 hours to confirm drying.
Safe Mold Removal
Before you remove anything, check for visible mold growth and decide what can be safely cleaned versus discarded. You’re protecting your space and your crew when you act fast and stay methodical. Wear gloves, an N95, and eye protection.
Inspect drywall, insulation, and carpet backing.
Mark soft, swollen, or stained areas.
Remove porous materials with mold deep inside.
Clean hard surfaces with detergent and water.
Dry everything completely to support mold prevention strategies.
Keep airflow high, but don’t spread dust with aggressive brushing. Bag debris sealed and carry it out immediately.
If the area is larger than 10 square feet, or sewage touched it, use professional safe cleanup practices. You’ll reduce health risks, protect nearby rooms, and stay connected to the process with clear, shared standards.
Fix Electrical and Structural Damage
If floodwater reached outlets, wiring, appliances, or load-bearing materials, shut off power at the main breaker and have a licensed electrician inspect the system before you restore service.
You should treat every wet circuit as unsafe until the electrical inspection confirms the wiring, breakers, and receptacles are dry and intact.
Next, arrange a structural assessment if framing, joists, subflooring, or drywall stayed soaked.
You’ll need repairs on any warped, cracked, or softened material before you reopen the space.
Replace damaged insulation and corroded fixtures, and don’t reuse appliances that were submerged.
Work with your crew to document each hazard, so you stay organized and confident.
When you repair the damage in order, you protect your home and help your household get back to normal.
Prevent Future Flood and Sewage Backups
Once cleanup is complete, you should reduce the chance of another flood or sewage backup by inspecting and maintaining the systems that failed. Check floor drains, sewer lines, sump pumps, and backflow valves, and service them before the next storm.
You can protect your space with targeted drainage solutions and moisture barriers that keep water moving away from the foundation.
- Clean gutters and downspouts.
- Grade soil away from walls.
- Test sump pumps monthly.
- Install or inspect backflow preventers.
- Seal cracks in slabs and joints.
Keep records of repairs, maintenance dates, and inspections so you can spot patterns early.
If your area floods often, work with a licensed plumber or water-control contractor to build a stronger plan. That team approach helps you stay prepared and protects your home.
Frequently Asked Questions
How Do I Document Sewage Damage for Insurance Claims?
You should photograph all sewage damage, keep dated notes, save receipts, and list affected items. Follow sewage cleanup procedures and collect insurance claim documentation, including measurements, vendor reports, and adjuster communications, so your claim feels complete.
When Should I Call a Professional Cleanup Company?
Call a professional cleanup company when you notice sewage contamination signs, widespread damage, or hidden moisture. You’ll get professional cleanup benefits, reduce health risks, and restore your space faster with proper containment and disinfection.
Can I Safely Stay in My Home During Cleanup?
Probably not, if cleanup exposes you to contamination; imagine a basement with standing water and odor. You’ll face health risks and a longer cleanup duration. Leave until professionals clear it, unless they’ve isolated the area.
What Protective Gear Is Best for Minor Sewage Exposure?
For minor sewage exposure, you should wear waterproof gloves, boots, eye protection, and a fitted mask; gloves importance and mask necessity can’t be overstated. You’ll reduce skin contact, inhalation, and contamination risks.
How Long Does Insurance Typically Take to Approve Repairs?
You’ll usually get claim approval in 1–4 weeks, but insurance policy differences can stretch claim approval timelines longer. You should submit photos, estimates, and receipts quickly to keep your repair team moving and connected.
Recap
You’ve got to treat sewage cleanup like a full-scale emergency, because even a small backup can turn into a monster fast. Check hazards, stop the water, pump out sludge, dry everything thoroughly, and disinfect every surface. Cut out ruined materials, watch for mold, and repair electrical or structural damage right away. Then lock in prevention steps so the same flood or backup doesn’t ambush you again. Quick action now can save your home later.