
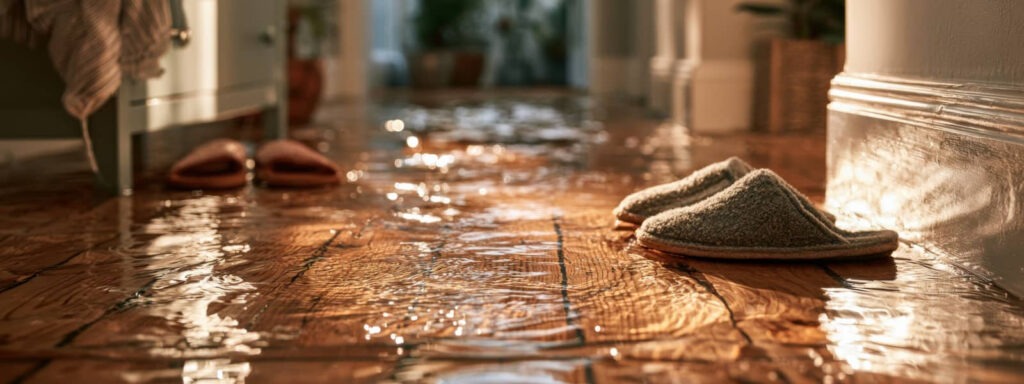
Flood cleanup is both urgent and methodical: you need fast action and careful control. 24/7 Flood Cleanup starts with shutting off water and power, then removing standing water with flood pumps before moisture spreads. Next, dry walls, floors, and contents, sanitize affected surfaces, and watch for mold. If the damage exceeds your tools or time, a restoration team can finish the job—if you know when to call them.
Key Takeaways
- Shut off electricity, gas, and water before cleanup, and avoid standing in floodwater until hazards are confirmed safe.
- Wear boots, gloves, eye protection, and a respirator, and photograph damage before moving anything.
- Remove standing water quickly with a suitable pump or wet vacuum, and keep hoses and cords safely routed.
- Dry affected areas continuously with fans and dehumidifiers, and keep indoor humidity below 60% to prevent mold.
- Call a restoration team for sewage, stormwater, structural damage, or hidden contamination in walls, insulation, or wiring.
What to Do First After Flooding
Before you enter the area, turn off the main power if it’s safe to do so and avoid standing water until you know the electrical system is de-energized.
Then enter with flood preparation in mind: wear boots, gloves, and a respirator, and carry emergency supplies, including flashlights, batteries, phone chargers, and clean water.
Photograph damage before you move items, and keep your team’s paths clear so everyone can work safely.
Open windows if weather allows to improve airflow, but don’t use fans near wet wiring.
Remove small valuables, documents, and medications first.
Check for gas odors, ceiling sagging, and unstable flooring, then mark hazards so no one else steps there.
Stay organized, communicate often, and you’ll protect your crew, your home, and your recovery progress.
Turn Off Water and Power Safely
Now that you’ve assessed the space and marked immediate hazards, shut down utilities before cleanup begins.
Locate the main water valve and close it fully; if you can’t reach it safely, contact your utility provider.
Then switch off electricity at the main breaker, but never stand in pooled water or touch wet panels.
If you smell gas, leave the area and call emergency services.
Wear gloves, rubber boots, and eye protection, and keep your team aligned on safety precautions before anyone reenters.
Add a flashlight, insulated tools, and a voltage tester to your equipment checklist so you can verify conditions without guesswork.
Clear communication helps everyone move with confidence, protects your crew, and keeps the cleanup organized from the start.
Remove Standing Water With Flood Pumps
Choose a flood pump that matches the water depth, debris load, and discharge rate you need.
Position the intake in the deepest area and route the hose to a safe drainage point.
Run the pump continuously until you remove the standing water as quickly as possible.
Choose The Right Pump
When standing water lingers after a flood, you need a pump that matches the depth, volume, and debris load of the area.
You can trust submersible pumps for shallow basements, sumps, and indoor zones because they sit in the water and move it efficiently. For larger, outdoor, or power-lost sites, engine driven pumps give you portable power and higher discharge capacity.
Check the pump’s head rating, intake screen, hose size, and solids handling before you start. If debris is present, choose a model designed for dirty water so you won’t clog the impeller.
You’ll work better when your equipment fits the job, and your crew stays coordinated. The right pump helps you control the site, protect materials, and keep cleanup moving with confidence.
Drain Water Quickly
With the right pump in place, you can start removing standing water as fast as conditions allow. Position the intake at the lowest point, prime the unit, and keep discharge hoses straight to limit backflow.
You’ll get better results if you monitor the water line and move the pump as levels drop. Use water removal techniques that match the site: submersible pumps for deep pools, utility pumps for shallow spread.
Clear debris before it clogs the inlet, and check power cords for safe operation. Team up with your crew, communicate each change, and keep a steady pace.
These efficient drainage methods help you protect structure, reduce slip hazards, and restore access sooner.
Dry Walls, Floors, and Contents
Use fans, dehumidifiers, and controlled airflow to dry wall cavities, framing, and surface materials as soon as possible.
Remove remaining floor moisture with wet vacuums, squeegees, and absorbent materials, then check for trapped water under baseboards and flooring.
Sort wet contents by material and contamination level, and salvage only items you can clean, dry, and disinfect safely.
Wall Drying Techniques
Start wall drying as soon as you’ve removed standing water and set up safe access, because moisture trapped in drywall, framing, and flooring can spread damage fast.
Begin with wall moisture assessment using a moisture meter and visual checks for swelling, staining, and cool spots. Open cavities where water entered, remove baseboards, and drill small vent holes only when needed for airflow.
Position air movers to sweep across the wall surface, and run dehumidifiers to pull moisture from the room. Keep temperature stable and monitor readings twice daily.
If insulation stays wet, plan insulation replacement promptly to prevent hidden mold and odor.
You’re not doing this alone; follow a consistent drying routine, document progress, and confirm each wall reaches a safe dry standard before closing it up.
Floor Moisture Removal
Sweep standing water off the floor immediately, then map out wet zones so you can dry the slab, subfloor, and any trapped contents in the right order.
Use moisture detection to confirm where water lingers under carpet, tile, laminate, or engineered flooring materials. Pull up saturated pads, loosen edge trim, and create airflow beneath each section.
Position dehumidifiers to keep relative humidity low and run air movers along the surface to speed evaporation. Check cold spots, swollen seams, and damp joints every few hours, then adjust your setup until readings drop.
If you’re part of a crew, assign one person to monitor instruments and one to log changes so everyone works from the same plan.
Keep the area contained, safe, and progressing steadily toward dry conditions.
Salvaging Wet Contents
Once the structure is drying, sort wet contents by what you can save, what needs professional cleaning, and what you should discard to prevent mold and secondary damage.
You’ll protect your recovery team’s progress by moving wet items to a clean, dry staging area. Photograph damage before handling.
For hard goods, wipe, rinse, and air-dry with fans and dehumidifiers. For textiles, launder promptly if the care label allows; otherwise, use salvage techniques like controlled drying and freezing until treatment.
Porous items such as upholstered furniture, drywall-backed panels, and soaked insulation usually need disposal.
Separate electronics, books, and documents fast, then contact specialists for contents cleaning.
Wear gloves and a respirator, keep pathways clear, and label each group so everyone on your team can work safely and stay coordinated.
Clean and Sanitize Flood-Damaged Surfaces
Before you disinfect, scrub all flood-damaged surfaces with hot water and detergent to remove mud, dirt, and other debris. You’ll get better results when you work in small sections and change rinse water often.
For effective surface cleaning, use brushes or cloths that match the material so you don’t scar finishes. After washing, apply a disinfectant labeled for hard surfaces and follow the contact time exactly; that’s one of the most reliable sanitation techniques.
Rinse food-prep areas, toys, and anything that touches skin with clean water after treatment. Keep your team aligned by wearing gloves and eye protection, and dispose of cleaning materials safely.
If a surface still feels sticky or grimy, repeat the process until it’s visibly clean and ready for use.
Prevent Mold After Flood Cleanup
After flood cleanup, dry everything as quickly as possible to stop mold from taking hold. You should move wet materials into airflow, pull up soaked rugs, and open wall cavities where moisture lingers.
Use fans and dehumidifiers together so you can keep indoor relative humidity below 60%. Check hidden areas daily: behind baseboards, under cabinets, inside closets, and around HVAC returns.
If you find damp insulation or porous items that still smell musty, remove them fast. These mold prevention strategies work best when you act in a coordinated way with your household, sharing tasks and tracking dry times.
Choose humidity control solutions that fit your space, and keep monitoring for condensation on windows or cool surfaces.
Call a Restoration Team if Needed
If the flooding was extensive, contaminated, or has reached walls, insulation, wiring, or HVAC components, call a restoration team right away.
You’ll get trained crews who can assess moisture, remove damaged materials, dry hidden cavities, and document losses for insurance. Their restoration services also reduce the risk of structural decay and airborne contaminants.
If you’ve had sewage, stormwater, or prolonged saturation, don’t wait for surface areas to dry; damage often spreads inside the assembly.
Ask for expert advice on containment, dehumidification, and safe reentry. You stay safer when you let specialists handle hazards you can’t see.
If you’re unsure, a fast inspection can confirm what you can fix yourself and what needs professional equipment.
Frequently Asked Questions
How Do I Document Flood Damage for Insurance Claims?
Photograph flood damage, video every room, and list damaged items with dates, model numbers, and values. Save receipts, water-level evidence, and cleanup records. Submit everything quickly to support your insurance process and strengthen your claim.
Can Floodwater Contaminate My HVAC System?
Yes—floodwater can contaminate your HVAC system with floodwater contaminants, and you may face hidden HVAC damage. You should shut it down, avoid using ducts, and have a qualified technician inspect, clean, and sanitize it promptly.
What Personal Protective Equipment Should I Wear During Cleanup?
You should wear waterproof gloves, goggles, boots, and an N95 respirator. Flood cleanup injuries affect 1 in 3 workers, so gloves importance and mask necessity aren’t optional—you’re protecting yourself, and you belong safe, prepared.
How Soon Should I Replace Soaked Insulation?
You should replace soaked insulation immediately after moisture assessment confirms it can’t dry quickly. Remove it the same day to limit mold, loss, and hidden damage. You’ll protect your home and feel confident restoring safe conditions.
Are My Belongings Salvageable After Sewage Backup?
Maybe—many porous items exposed to sewage contamination aren’t salvageable. You can often save hard, nonporous belongings with fast cleaning. Inspect each item, compare restoration options, and follow safety guidance before you keep anything.
Final Thoughts
If floodwater hits, act fast: shut off power and water, pump out standing water, and dry everything within 24 to 48 hours to reduce mold risk. That timeline matters because mold can start growing in as little as 24 hours. You should wear protective gear, clean and sanitize surfaces, and document every step for insurance. If damage is severe or hidden, don’t guess—call a restoration team to inspect, dry, and recover your property safely.