
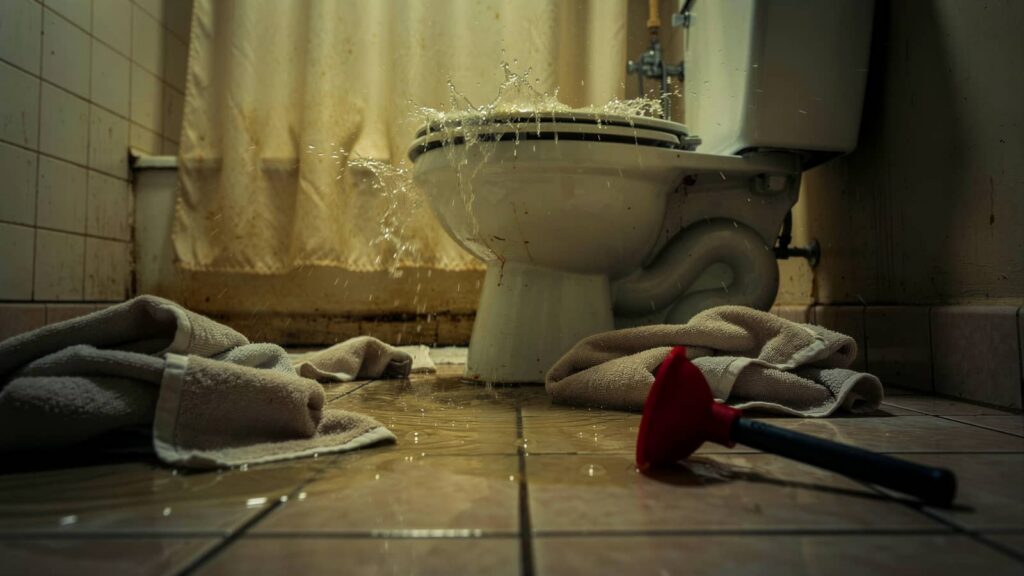
Floodwater can hide sewage, live hazards, and structural damage in the same room. You need to treat the area as contaminated before you step inside, shut off power and water if it’s safe, and document every visible loss first. Then you can remove standing water, clean hard surfaces, dry the space, and watch for mold before the problem spreads. Some damage needs a restoration pro, and that’s where the next steps matter.
Key Takeaways
- Treat sewage-contaminated areas as hazardous and restrict access until the damage is assessed.
- Wear PPE: waterproof gloves, boots, long sleeves, eye protection, and a fitted respirator.
- Shut off gas, electricity, and water if safe, and check air quality before entering.
- Pump out standing water, remove wet porous materials, and document all flood damage first.
- Clean hard surfaces with soap and sewage disinfectant, then dry thoroughly and watch for mold.
Reduce Sewage Cleanup Risk
To reduce sewage cleanup risk after a flood, you should treat every contaminated area as hazardous and limit access until you’ve assessed the damage. You’ll protect your team by establishing clear work zones, removing standing water, and disposing of porous materials that can’t be reliably cleaned.
Use preventive measures such as sealing off drains, documenting damage, and coordinating with local utility crews before you start. Follow sanitation practices that include frequent handwashing, tool disinfection, and proper waste containment.
Wear dedicated cleanup gear, and keep contaminated items separate from salvageable belongings. If you stay organized and follow a shared plan, you’ll reduce cross-contamination and help everyone work safely and efficiently.
Protect Yourself Before You Enter
Before you enter the flood-damaged area, put on protective gear such as waterproof gloves, boots, eye protection, and a respirator.
Shut off electricity, gas, and water at the main controls if you can do so safely.
Check the air for odor, visible vapor, or poor ventilation before you go inside.
Wear Protective Gear
Suit up with the right protective gear before you step into flood-contaminated sewage areas. You need protective clothing that blocks splashes, absorbs less contamination, and lets you work efficiently.
Wear waterproof gloves, rubber boots with thick soles, long sleeves, long pants, eye protection, and a fitted respirator if airborne hazards may be present. Keep your safety equipment intact, clean, and sized correctly; torn gear won’t protect you.
Tape glove cuffs to sleeves and pant legs over boots to reduce gaps. If you’re part of a cleanup crew, check each other’s gear before entry so everyone stays covered and confident.
After use, remove items carefully to avoid self-contamination, then bag them for proper cleaning or disposal.
Shut Off Utilities
Shut off gas, electricity, and water at the main controls before you enter a flood-damaged sewage area. This step is a core part of sewage safety, and it keeps you and your crew from adding risk to an already hazardous job.
Verify each utility is fully isolated before you cross the threshold, then tag the controls so no one restores power or flow by mistake. If you can’t reach the main shutoffs safely, contact utility management and wait for trained personnel.
Never assume a wet structure is de-energized or disconnected. You belong on a team that works methodically, so use a checklist, confirm each shutoff, and document the time and person responsible.
That discipline protects everyone during cleanup.
Check Air Quality
Check the air before you step inside, because flood-damaged sewage areas can hold oxygen-poor air, methane, hydrogen sulfide, and other toxic gases.
Use a calibrated gas meter if you’ve got one, and don’t enter until readings stay within safe limits.
Crack doors and windows from outside to improve circulation, because ventilation importance is critical when wastewater has backed up.
If you smell strong sewage, rotten eggs, or notice dizziness, leave immediately and call a professional.
Wear a fitted respirator rated for airborne pathogens when you must inspect the area.
Keep your team together, communicate clearly, and keep children, pets, and anyone with breathing issues out.
You’re protecting your crew, and that shared caution helps everyone get back inside safely.
Shut Off Power and Water Safely
Before you enter, turn off the main power at the service panel if it’s safe to reach it, or have the utility disconnect it.
Then close the main water supply valve to stop additional flooding and contamination.
These shutdowns reduce electrical shock risk and limit sewage spread during cleanup.
Turn Off Main Power
If floodwater has reached outlets, appliances, or wiring, you need to cut power at the main breaker right away and keep away from any standing water near electrical equipment.
Use your safety protocols before you enter the service area, and don’t touch the panel if it’s wet, corroded, or hard to reach. Wear insulated boots and dry gloves, and keep your equipment checklist close so you can confirm you’ve got a flashlight, noncontact voltage tester, and a partner nearby.
If the breaker box sits in a flooded zone, wait for a licensed electrician. You’re not overreacting; you’re protecting your crew and your home from shock, arc flash, and hidden faults.
Once power’s off, mark the area and stay out until it’s cleared.
Close Water Supply Valves
Next, close the main water supply valve to stop more floodwater from entering the home or worksite. You should locate the shutoff quickly, then turn the handle clockwise until it stops.
If the valve feels stuck, don’t force it; you could damage the line and compromise plumbing safety. Use water valve maintenance habits you’ve practiced before the storm, so you can identify the valve fast and operate it without hesitation.
If you’re in a shared building, alert your team or neighbors so everyone stays coordinated and protected.
After shutting the supply, open a nearby faucet to relieve pressure and confirm the line is closed. This step helps your crew work more safely, limits contamination spread, and keeps cleanup organized from the start.
Document Flood Damage Before Cleanup
A quick photo log can save you time and disputes later, so document all visible flood damage before you start cleanup. Use your phone to capture wide shots and close-ups of affected rooms, walls, floors, furniture, outlets, and baseboards. Add date stamps if your device allows it.
Then make a simple inventory that notes what’s damaged, where it’s located, and any obvious contamination. This flood documentation strengthens your damage assessment and helps you share accurate information with your insurer, landlord, or recovery team.
Keep copies in the cloud and on a separate drive so nothing gets lost. If you’re working with neighbors or family, assign one person to record each area. Clear records help your crew move with confidence and stay organized.
Remove Standing Water and Sewage
You should pump out contaminated water as soon as you can to reduce exposure and limit further spread.
Isolate sewage-affected areas with barriers or restricted access so you can control contamination during cleanup.
Then dry all surfaces thoroughly with ventilation and dehumidification to prevent residual moisture and microbial growth.
Pump Out Contaminated Water
Stand clear and begin removing standing water as soon as conditions allow, because sewage-contaminated floodwater can spread pathogens, damage structures, and delay drying.
You should use a sump pump or wet vacuum rated for dirty water, and discharge it into approved drainage systems or a sanitary sewer connection only if local rules allow.
Keep the intake low, move methodically, and avoid stirring settled solids. Monitor pump temperature and flow so you can stop clogs before they burn out the motor.
If the water level drops unevenly, reposition equipment and continue until all visible liquid is gone.
Working this way helps your crew stay safer, speeds cleanup, and gives you a controlled start toward recovery after the flood.
Isolate Sewage Areas
Barrier off the sewage-affected area before anyone enters to keep contaminated water and solids from spreading into clean spaces.
You should establish sewage containment with plastic sheeting, tape, or temporary barriers, and place clear area signage at each access point.
Keep children, pets, and unprotected helpers out until you’ve finished removal. Use dedicated boots, gloves, and tools inside the zone, and don’t carry them into safe areas.
If water is still present, you’ll need to control its path with berms or absorbent socks so it doesn’t reach drains, carpets, or living areas.
Work as a team, assign one entry route, and log who goes in and out. That shared discipline helps your household or crew stay organized, protected, and ready for the next cleanup step.
Dry Surfaces Thoroughly
Remove all standing water and sewage as quickly as possible to stop further damage and contamination. You should pump out pooled water, then mop and wet-vac remaining moisture from floors, joints, and low spots.
Open windows only if outdoor humidity is lower, and use fans for airflow management to move damp air toward exits. Place dehumidifiers in the driest part of the space and keep doors closed to improve dehumidifier usage and speed evaporation.
Check walls, baseboards, and subfloors for hidden moisture; if materials stay wet, remove them. You’re not just drying a room—you’re protecting your crew, your home, and your recovery plan.
Keep measuring moisture until readings match safe indoor levels, then disinfect all exposed surfaces before rebuilding.
Discard Contaminated Porous Materials
If sewage water soaked into porous materials, you should discard them because they can trap contaminants and continue to pose a health risk.
Remove items like carpeting, drywall, insulation, upholstery, and particleboard from the affected area, and bag them before moving them out of your home. Use approved disposal methods for contaminated waste, and follow local public health rules so your cleanup stays safe and compliant.
Wear gloves, boots, and a respirator when handling these items, and keep them separate from clean belongings. If an item can’t be fully dried and verified clean, treat it as contaminated. You’re protecting your household and your team when you err on the side of caution.
Work together, label the waste clearly, and don’t try to save porous materials that may hold sewage.
Clean and Disinfect Hard Surfaces
Once you’ve cleared away contaminated porous items, clean all remaining hard surfaces with soap and water to remove visible sewage and debris.
Then apply a disinfectant labeled for sewage cleanup, following the manufacturer’s contact time exactly. Wear gloves and eye protection so you can work safely and confidently alongside others handling recovery.
Use sanitation techniques that match the surface materials: nonporous tile, sealed wood, metal, and plastic each need full coverage, but never oversaturate joints or cracks. Scrub corners, handles, and seams where contamination hides.
Rinse if the product label requires it, and change cleaning cloths when they’re soiled. Keep the area restricted during cleaning so your team stays coordinated.
If residue remains, repeat the process until the surface looks clean and smells neutral.
Dry Out the Area Completely
Dry the area thoroughly with fans, dehumidifiers, and open windows if weather allows, because lingering moisture can let mold and bacteria return fast.
You should keep air moving across floors, walls, and hidden cavities, and you’ll want to empty dehumidifier tanks often so drying doesn’t stall.
Track humidity control with a meter; aim to bring indoor levels below 60% as soon as possible.
Use ventilation strategies that exhaust damp air outdoors, not into other rooms, so you protect the rest of your home and your cleanup crew.
Remove wet rugs, padding, and soaked materials that trap water.
Check baseboards, subfloors, and wall edges daily, and continue drying until every surface feels fully dry to the touch.
Watch for Mold Growth After Cleanup
Even after sewage-contaminated floodwater is gone, you still need to watch closely for mold, because spores can start growing within 24 to 48 hours in damp materials.
Inspect walls, baseboards, insulation, carpet, and hidden cavities for discoloration, musty odors, or fuzzy patches. Keep indoor humidity below 60% with ventilation and dehumidification, and remove any wet porous items that can’t be fully dried.
Your mold prevention strategies should include cleaning hard surfaces with detergent and clean water, then drying them quickly.
If you see growth, use mold remediation techniques that isolate the area, protect nearby clean spaces, and remove contaminated material safely.
Check daily for recurring moisture from leaks or condensation so your home stays healthy and your household stays confident together.
Know When to Call a Restoration Pro
Call a restoration professional if sewage contamination covers a large area, has soaked into walls or subfloors, or has been present for more than 24 to 48 hours. You’re likely facing hidden moisture, structural damage, and pathogen exposure that DIY cleanup can’t safely resolve.
Request a professional assessment before demolition.
Use restoration services for extraction, drying, and disinfection.
Call if insulation, drywall, or carpet feels saturated.
Escalate when odor persists after surface cleaning.
Protect your crew by isolating the area and wearing PPE.
A qualified team checks moisture, contamination, and material loss, then sets a safe recovery plan.
You don’t have to handle this alone; trusted help gets your space back to healthy faster.
Frequently Asked Questions
How Long Should I Wait Before Returning Home After Sewage Flooding?
Wait until authorities confirm it’s safe return; don’t go back until flood safety checks clear sewage, power, and structural hazards. You’ll usually need at least 24–72 hours, longer if contamination remains.
Can Flood-Contaminated Food Still Be Safely Salvaged?
No, you shouldn’t salvage flood-contaminated food; the FDA says exposed perishables can harbor contamination risks. You protect food safety by discarding sealed, opened, and refrigerated items touched by floodwater, then restocking together.
Which Insurance Policies Cover Sewage Cleanup After Floods?
You’ll usually rely on flood insurance for sewage cleanup after floods; standard homeowners policies often exclude it. Check your policy coverage for sewer backup endorsements, and confirm limits, deductibles, and exclusions with your insurer.
How Do I Handle Sewage Backups in My Basement Drain?
Stop the overflow, then shut off water and avoid the lower room. You should call a licensed plumber, inspect the trap, and start sewage backup prevention through regular basement drain maintenance, keeping your home’s shared safety intact.
What Symptoms Mean I Need Medical Attention After Exposure?
You need medical attention if you develop fever, vomiting, diarrhea, severe coughing, rash, eye irritation, or breathing trouble after exposure. These health risks often follow contamination signs like persistent odor, open wounds, or worsening fatigue.
Wrap-Up
When you clean up sewage after a flood, you’re not just restoring a room—you’re reclaiming safety. Treat every step like a line from Pandora’s box: once opened, hazards spread fast. Protect yourself, shut off utilities, document damage, remove contaminated water, disinfect, and dry thoroughly. Keep watching for mold, and don’t hesitate to call a restoration pro when the job’s beyond safe limits. Your caution now helps prevent bigger problems later.