
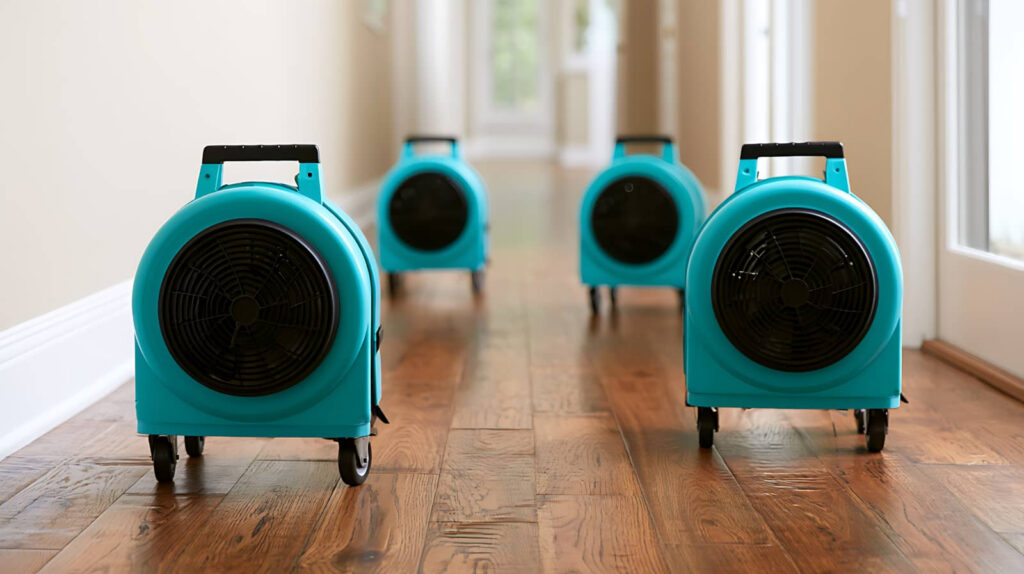
When floodwater hits your structure like a slow-moving machine, you need to act in a precise sequence: shut off the main water and remove standing water, open wet walls to expose hidden damage, then set up fans and dehumidifiers to drive out moisture. You’ll also need to check moisture levels until readings drop, because what’s left behind can still cause trouble. Once dry, clean surfaces fast so mold doesn’t get a foothold. This guide breaks structural drying after flooding into five clear steps you can follow.
Key Takeaways: Structural Drying After Flooding
- Shut off the water supply, remove standing water safely, and check for electrical hazards before starting drying work.
- Open wet walls, remove baseboards, and expose hidden materials to release trapped moisture and assess damage.
- Set up drying fans and dehumidifiers to move air across wet surfaces and extract moisture from the room.
- Monitor moisture levels regularly until floors, walls, and framing reach the dry standard.
- Clean contaminated surfaces, remove damaged porous materials, and prevent mold by keeping humidity low.
Shut Off Water and Remove Standing Water
First, shut off the main water supply to stop additional flooding, then disconnect any affected plumbing or appliances if it’s safe to do so.
Put on initial safety precautions: wear gloves, waterproof boots, and eye protection, and verify the area has no electrical hazard before you enter.
Then start water removal techniques right away. Use a wet vacuum for shallow water, a sump pump for deeper water, or buckets and squeegees when powered equipment isn’t available.
Work from the outer edges toward the center so you don’t spread contaminants. Remove standing water until surfaces are only damp, not pooled.
Keep doors open for airflow, and document what you’ve removed so your team can track progress and stay aligned.
Open Wet Walls and Expose Materials
Once standing water is gone, open wet walls so trapped moisture can escape and hidden damage can be assessed. You’ll remove baseboards, cut inspection openings, and expose wall insulation, framing, and moisture barriers in affected zones.
Work methodically so you can verify structural integrity and spot swollen drywall, rusted fasteners, or stained sheathing. Keep cuts limited to wet areas, and save undamaged sections where possible.
Label each opening and document what you find so your team stays coordinated. As you expose materials, improve air circulation by clearing furniture and trim that block wall cavities.
If insulation is saturated, discard it; it won’t dry properly in place. Once materials are open, you’re ready to evaluate what can be restored and what needs replacement.
Set Up Drying Fans and Dehumidifiers
Position drying fans to move air across wet surfaces and into open wall cavities, then place dehumidifiers in the same zone to pull moisture out of the air.
You should aim each fan so airflow overlaps and reaches corners, base plates, and framing pockets. Keep fan placement low for floors and higher for wall openings when needed.
Set dehumidifier settings to continuous operation so the unit keeps removing vapor without cycling off. Close doors and windows to keep the drying chamber contained, and route cords safely out of walk paths.
You’re part of a repair team now, so work in a coordinated way, check that each unit runs steadily, and adjust equipment spacing if airflow feels weak or uneven around the damaged area.
Check Moisture Levels Until Dry
Use a moisture meter to check floors, walls, framing, and hidden cavities at regular intervals while drying equipment runs. Record each reading, compare it to baseline values, and confirm that moisture drops steadily across every material.
Focus your moisture assessment on cold spots, baseboards, sill plates, and wall centers, since those areas often lag behind open surfaces. Adjust drying techniques if readings stall: reposition fans, increase dehumidification, or open access points to improve airflow.
Keep checking until measurements match the dry standard for your building materials. Stay methodical and stay with the team’s process, because consistent monitoring helps you finish strong and avoid missed wet areas.
When every zone reads dry, you can move forward with confidence.
Clean Surfaces and Prevent Mold Growth
After surfaces reach dry standard, clean them promptly to remove silt, residue, and organic debris that can feed mold. You’ll protect your team’s work area by using approved detergents and clean water for surface cleaning on framing, subfloors, and concrete.
Scrub visible contamination, then rinse and wipe dry so no film stays behind. If porous materials still smell musty or show staining, remove them and replace them; cleaning won’t restore them.
Keep humidity low, keep air moving, and run dehumidifiers until readings stay stable. For mold prevention, inspect corners, joints, and hidden cavities daily, since moisture can linger there.
Wear gloves, eye protection, and a respirator when needed. When you stay consistent, you help everyone return to a safer, healthier space.
Frequently Asked Questions
How Do I Document Flood Damage for Insurance Claims?
You’ll document flood damage by taking date-stamped photos, completing a flood assessment, and building a damage inventory. List affected materials, serial numbers, moisture readings, and cleanup costs, then submit everything to your insurer promptly.
When Should I Call a Professional Structural Drying Company?
Call a professional structural drying company immediately if floodwater’s entered walls, flooring, or insulation. Prompt flood timing matters; you’ll get a professional assessment, prevent hidden mold, and protect your place with the right crew.
How Can I Tell if Electrical Systems Are Safely Restored?
You can tell electrical systems’re safely restored when a licensed electrician completes an electrical safety inspection and signs off the restoration checklist. Then you’ll test outlets, breakers, and GFCIs, and verify no heat, sparks, or tripped circuits.
What Personal Protective Equipment Should I Wear During Cleanup?
You should wear safety gear: waterproof gloves, boots, eye protection, and a respirator. Add protective clothing, like long sleeves and coveralls, to limit exposure to contaminants. Replace damaged gear promptly and keep it clean.
How Do I Handle Salvaging Furniture and Valuables After Flooding?
You should triage furniture and valuables like a hospital on 9/11: assess value, photograph damage, then separate salvageable items for furniture restoration. Clean, dry, and document everything; you’ll protect what matters and stay connected.
Conclusion
By following these five steps, you’ll speed structural drying and protect your property after flooding. Shut off water, remove standing water, open wet walls, and set up drying equipment quickly. Then check moisture levels regularly until materials reach safe levels. Finally, clean surfaces promptly to curb mold growth and keep the space safe. When you act fast and follow the process, you’ll support stronger structure, faster recovery, and fewer future failures. Following these steps for structural drying after flooding helps protect your home from lasting damage and mold growth.